Data Transfers - Globus

GETTING STARTED WITH YOUR GLOBUS ACCOUNT

  1. Go to www.globus.org and click “Login”
  2. Use your existing organization login if available (example: Washington University)
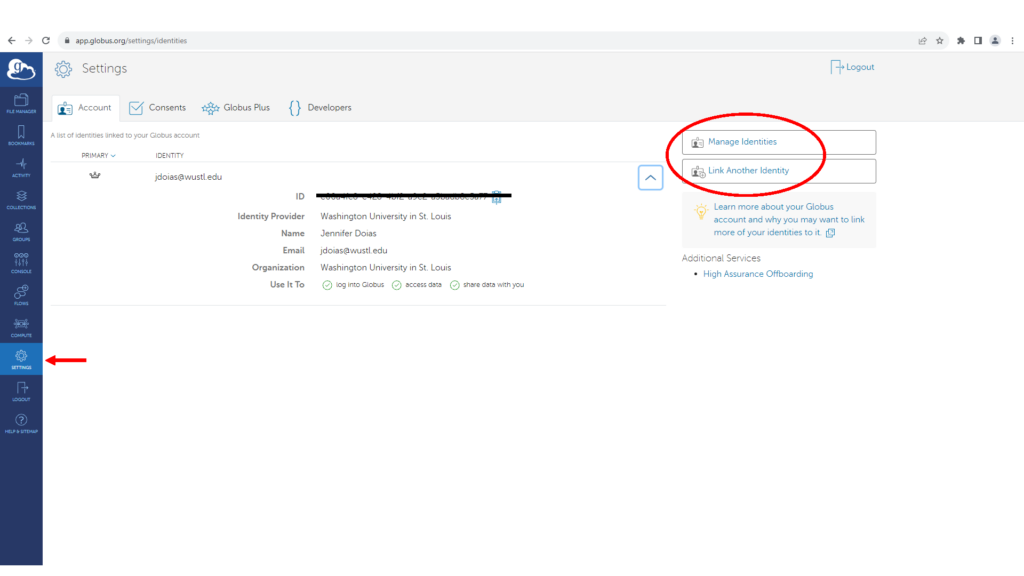
  3. If you have multiple Globus accounts (example: Google, ORCID, etc.), we recommend linking your other Globus Identities to your organizational account to avoid confusion about what data you can access with different login options.
 

Learn more about Globus

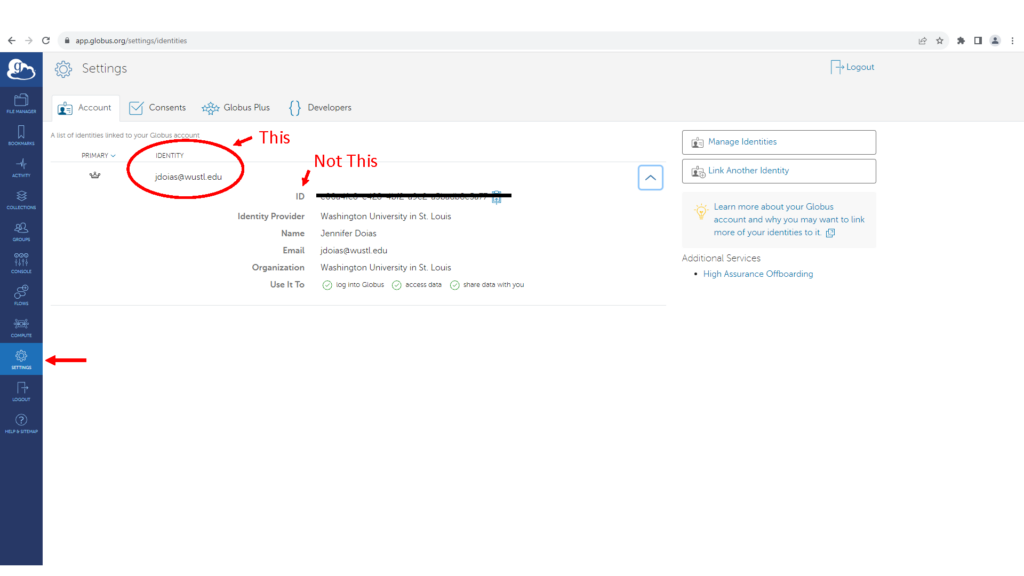
WHAT IS MY GLOBUS IDENTITY?

In a Globus window, select “SETTINGS” from the choices on the left of the screen.
TRANSFERRING DATA VIA GLOBUS

Transferring Data to a Managed Endpoint

Researchers downloading data to a Globus managed endpoint such as a Washington University RIS storage account:
  1. Click on the Globus link (It will take you to the login page if needed)
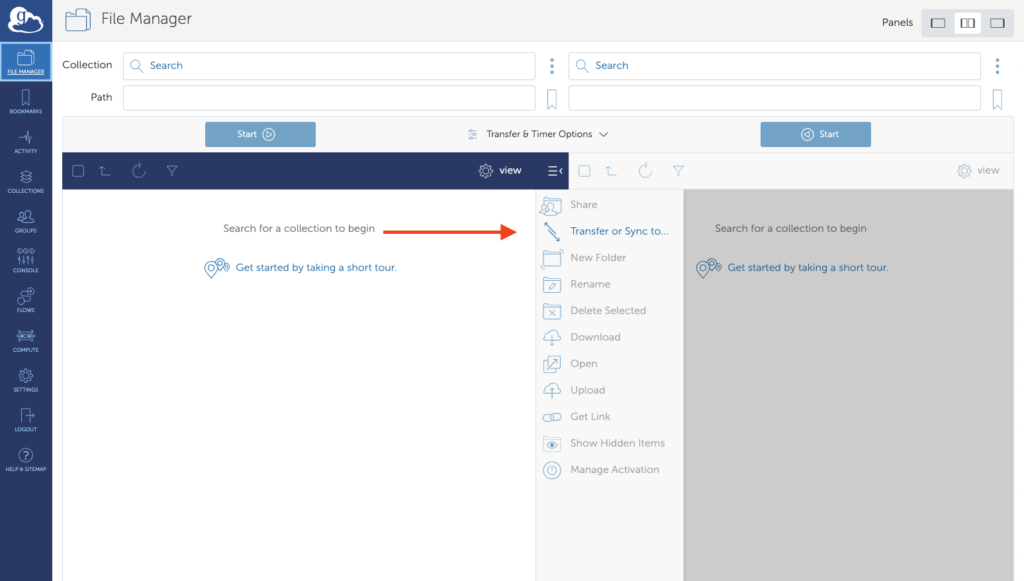
  2. Go to “File Manager”(on the left side of screen) and select the files that you want to transfer (download)
  3. Select the “Transfer or Sync to…” icon
  4. On the right (in the destination) enter the storage endpoint “RIS Storage1” in the “Collection”.
  5. Then enter the path to your RIS storage allocation in the “Path” box.
  6. Select “Start” to begin the transfer.

Transferring Data to a Personal Computer

If you wish to transfer data to a desktop computer or hard drive, you will need to install Globus Connect Personal (https://www.globus.org/globus-connect-personal) and create an endpoint or “collection”. Once a “collection” is created, all data transfers to your computer will be directed to that location. (Subdirectories or folders can be used to separate multiple datasets within the collection.)

Sharing Your Data

  1. Click on the Globus link (It will take you to the login page if needed)
  2. Go to “File Manager”(on the left side of screen) and select the “Collection” you wish to share.
  3. Once the “Collection” is highlighted, click “Share”(on the right side of screen) and follow the prompts to complete the sharing process.

Learn more about Globus Data Sharing